


-a pair of shoes you want to blinged out
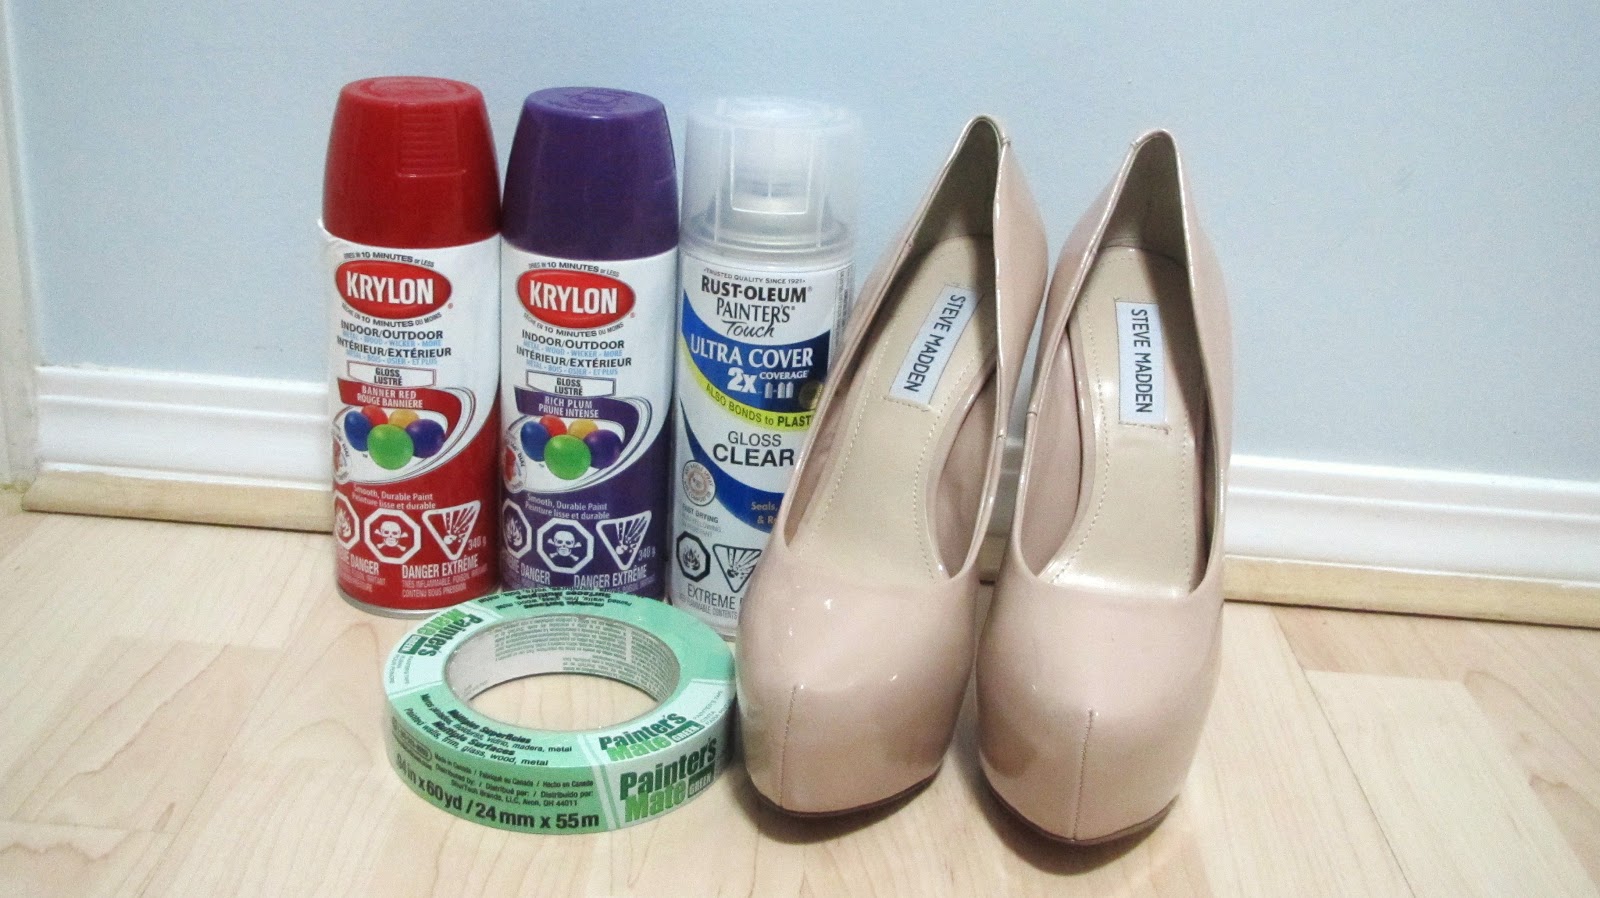
-paint of some sort (I would not recommend using spray paint since it doesn't stick to plastic but I had to do the best I could since this was the first time I tried using spray paint. I think it is because of Krylon's spray paint since it is watery.)
My red spray paint from Krylon is called "Banner red" and the purple is called " Rich Plum"
My red spray paint from Krylon is called "Banner red" and the purple is called " Rich Plum"
-Gloss if you are going to spray paint the bottom like me.
-Painter's tape
-Swarvoski Crystals---------> I used mainly 9css (2.65 mm)
I bought my Swarvoski crystals in bulk by the 10 gross (1,440 pieces) for $44.58.
Other sizes I used was 12 ss (3.1 mm), 16ss (3.9 mm), and 20 ss (4.7 mm).
Let's talk money wise just to get it out there. I know that the amount of money to me is really important since it it kind of like to prepare myself from the knowledge so it isn't really that big of a shock if I do want to buy something or do something.
Steve madden Shoes $92
Spray paint $4.67 per can x 2=$9.34
Gloss $5.50
Painter's tape $3.34
E6000 glue $4.50
E6000 glue $4.50
Swarvoski Crystals 9 ss---->10 gross $44.58 x 8= $356.64
9 ss----> 3 gross $6.35 x 3= $19.05
12 ss----> 1 gross $7.51 x 3= $22.53
16 ss----> 1 gross $9.34= $9.34
20 ss---> 1/2 gross $7.80= $7.80
---------------------------------------------------------
Crystal sub total: $415.36
Online shipping fee: $6.55 + $5.69= $12.24
Crystal Total: $427.6
---------------------------------------------------------------------
Material and crystal total: $542.28
You might notice there for the crystal shipping fee has two totals. That is because I under estimated how many crystals would actually take to finish this project so I had to order from them twice. Shipping took about 1 and a half week which isn't bad. I live across the border and rhinestonebiz.com is from L.A.
I did end up using 4 different sizes to do this shoe and I love the result of it. 9ss is most definitely the best size since it isn't too small but it isn't so big where it is an eyesore to look at. If I had to do something over again with the sizes of crystals, I wouldn't buy as much 16 ss and 20 ss since I did have quite a few left over. 20 ss is about 5 cm so it is really big but i like how i can spot the really big crystals in the mist of the small ones.
What to do/ directions:


1) Tape down the parts that you don't want the paint to get on. Make sure you also tape the sole and the sides too!
What I would do over again:
I would actually do the sole last and actually spray paint the body of the shoe first. There is this other website called redomyshoes where i saw some pictures where he used a pot paint which I'm guessing its either oil based paint or acrylic but I'm not sure so don't quote me! If someone could help me on this, that would be great :D.
Also the paint does leak through the cracks of the tape if it isn't completely flat. So make sure you put two or three layers of tape. I used a razor to get really close to the edges of the sole that shows so it doesn't get too messy.

2) Spray paint the bottoms. Make sure you don't do a full on coat but it build it with two or three coats. The bottle says to have the object that you want to paint some certain distance but I only had my arm distance since I had to hold it up LOL. Each coat I had to wait for about 20 mins for it to be completely dry. Make sure you don't spray too much or there will be red tears coming down your shoe and would become uneven which wouldn't be pretty :/.
I'm really happy about the color since it is a really true engine red, just like the Christian Loubutins. I mean yea I wish i had $6,000 to spend on a pair of shoes but I don't so this will have to do .

Yey they are drying :D.

Make sure you don't spray paint in the garage with your cars in it. Also have a lot of newspaper laid on the floor so your floor doesn't turn rainbow colors LOL. I spray painted in my garage since i found that the cold weather and humidity where I live didn't really help dry the paint so I stayed back in the garage. Just make sure you have a crack from your garage door so you can get some air flow from the toxic scent. After the red has dried, add your coat or two of the gloss.

I love the red sole peeking out :). I love the result too!

This is what happens when you don't layer your tape and your paint just seeps onto your shoe. Its not a fun thing and I had to scrub and rub the paint off with some rubbing alcohol and nail polish remover pads. It didn't take all of the paint off and it did stain a bit but that is okay since I was painting over it too.

3) Next step is to paint the body. Just follow the same steps as the ones above.

For the purple spray paint prep, i actually carefully tape across the sole to the stilettos so the paint could be flawless in the end and that is the part where it shows so that had to be spotless from purple paint. The bottoms didn't matter as much if paint bot onto them snce it would just grind away with wear anyways.
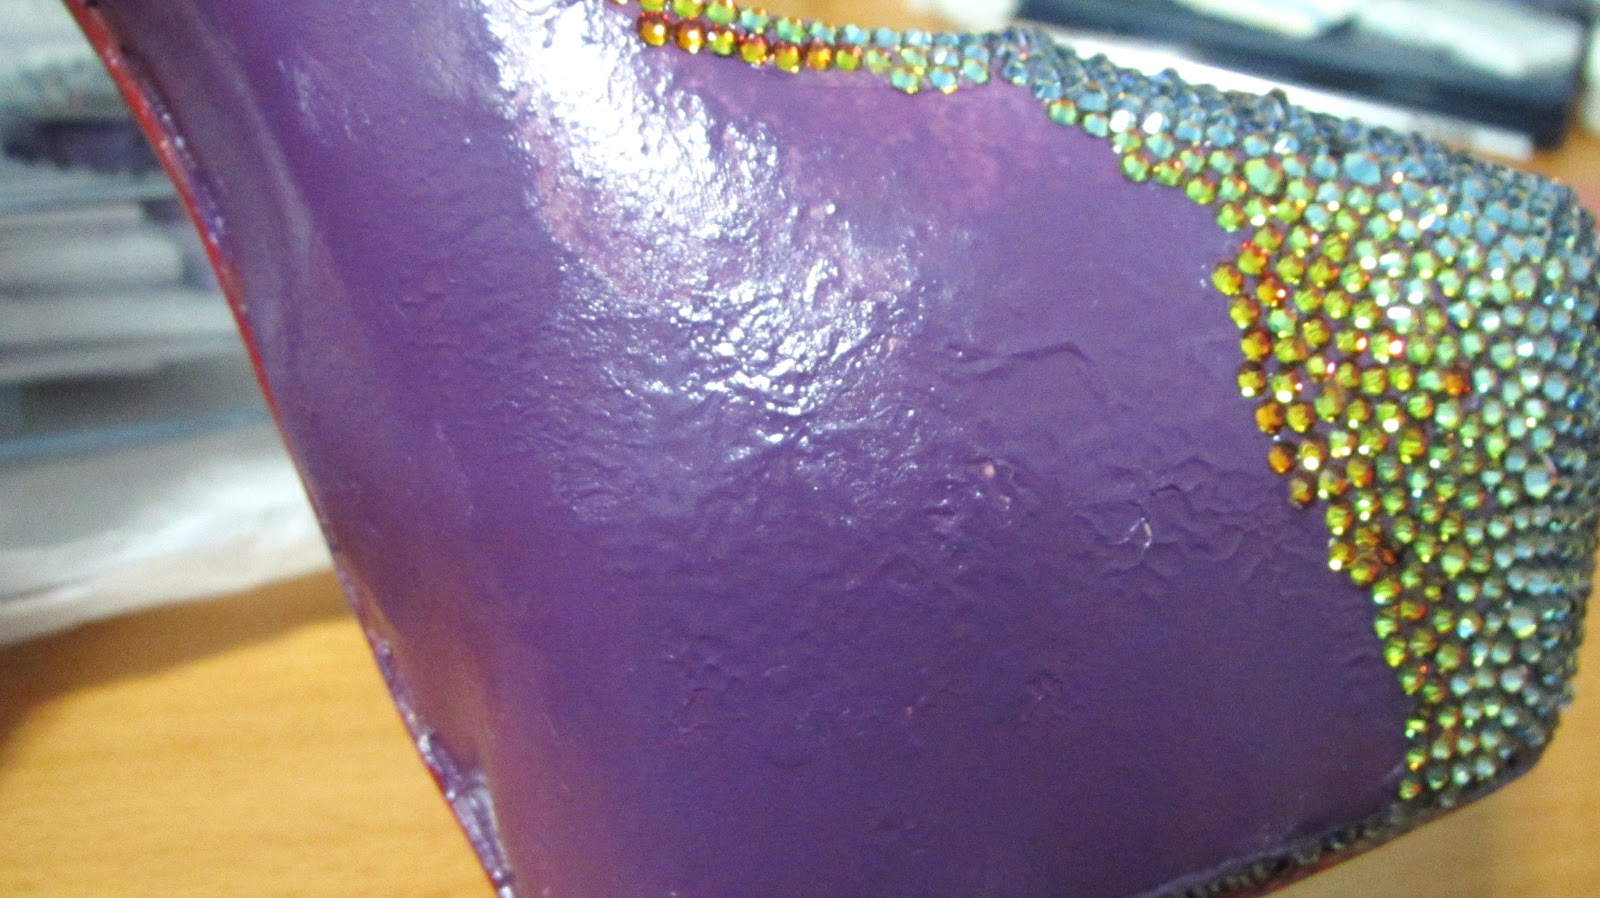
I actually forgot to take a picture after the purple paint job but it looked really bad. The paint wouldn't stick onto the shoe and it was just sliding. Even when I tried to paint over it, the paint would just re-wet itself and slide some more. It was so annoying and by the third layer, it just started to clump. Then I just got annoyed so I sprayed some more and then it started to crack. So don't over spray your shoes and get better spray paint LOL. Even though the paint job on the body was really sucky, you really have to make sure that your rims are painted since that is the only parts that will show after.

4) Once the paint job is done, it is time to do strassing (adj. for place crystals onto a surface one by one). I didn't buy myself a pick up rhinestone tool since I thought i could just use orthodontic wax (used for placing over braces if the wire would irritate your mouth) which you can find at any drugstore for about $2 and i placed it on the tip of a skewer. Make shift rhinestone tool :D.

I found that I actually like this method a lot more since it is more of a point compared to the regular rhinestone pick up tool which just has a really big ball of wax on the tip. This way I can be precise.

The other end of the skewer I cut to an angle so I could move the crystals around with ease.

Ugh you can see the terrible paint job. Its pasty, crusty and all the times you don't want in a shoe. Thank god the sole came out flawless!
To start off, make sure you line up all the crystals around the edge so you get the cleanest finish. These pictures are actually from the first show I did so I don't have the pictures of me don't the rims first but I'm telling you from experience.
For the glue, I didn't use a syringe since I found that more annoying thing actually just directly squeezing it onto the shoe and spreading it with a skewer. Just make sure you place a crystal over the edges of the glue because if you let it dry and then put more over it, the crystal will not stay flat and the glue is a pain in the ass to take off so beware!

It's coming along :D. The wax does get onto the crystals a little bit but nothing that windex can't fix!
Yes! I'm covering the ugly paint job! it did take about 6 hours straight to do just half of the shoe and the stiletto. I did sit on my chair for 13 hours straight to finish my right shoe since I had to wait for my second package. This is not a job for those that are impatient but the end result is completely worth it. This is the ultimate shoe and the love, tears, and bum pain is worth all of it since I wake up in the morning and I see my shoe sparkle from the sunshine. Sigh, I'm happy LOL.
Also the seam in the front of the shoe I wasn't a big fan of so when it came time to put crystals over it, I put extra glue on there and carefully placed the crystal on top so it would cover the seam perfectly. Loveee it~
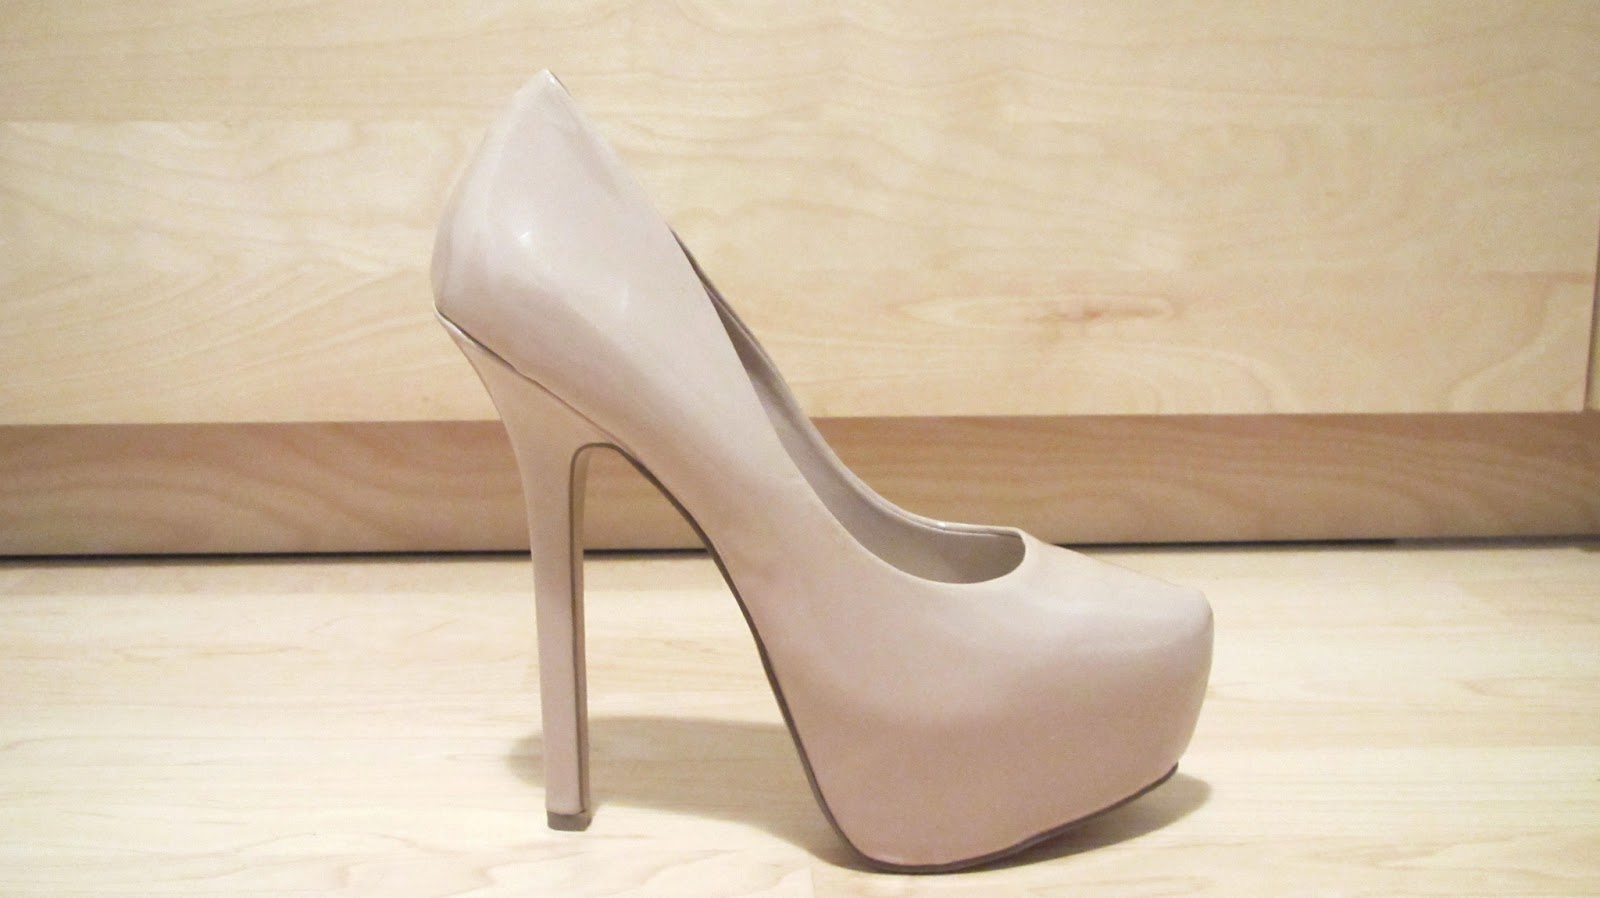
Before....

Before and after! So pretty. :D


I love how the crystal I use has 5 different colors from the different angles you tilt or see it in.

Overall yes this is a very expensive DIY project but I mean I'm going to have these shoes forever and how many people has swarovski crystal shoes! Its just a fun thing and I can't wait to wear these out!
Would you try these shoes out? Are you up for it?
omg! that is so beautiful! you make a huge work and your shoes are awesome! Congrats!
ReplyDeleteThank you :D. Took a while and a lot of money but it turned out amazing and i love it more then if i went to buy the christian loubutin ones.
DeleteWow these look amazing! You did an awesome job!
ReplyDeleteThanks :D.
DeleteI like your project, however, your paint job was not prepared correctly. Patent leather doesn't take paint very easy so you needed to spray the shoes with No Sand adhesion promoter, like SEM, before painting. Also, the best paint for your shoes would be acrylic paint like angelus or lumiere it would be much better result. As for the bottom, you did a great job. You can use this website for crystal purchasing called beadsfactory.com they have swarovski and preciosa wich is another great crystals cheaper than swarovski, this is a store in LA fashion district and they have their own website there price is the best deal out there.
ReplyDeleteGood luck in your next project.
Wow thats for the advice. I was wondering for such a long time what paint would be best for this type of shoe. I think this would be my first and last pair of sparkle shoes LOL. Your a life saver :D. And i have seen those crystals too, the preciosa ones on the website I bought my crystals from, i just wasn't sure about the quality of it.
Delete